Save The Protein For The Gym

Beer, Brewing, Engineering, Equipment, Ingredients, Recipe

I love working with adjuncts. I think finding the different qualities fruits, vegetables and obscure grains can bring to your beer is amazing. The only issue with that is some of those malts or other little fellas can up the protein in my mash. Possibly leading to off flavors or bad conversion.

That’s when I need to take a little more time to enjoy some more homebrew and go with a protein rest. A protein rest helps to breakdown proteins into smaller proteins and amino acids, plus it’ll let you get at more of those starch strains letting your saccharification have more potential for a good efficiency.

While it does add to the brew day, it’s going to also add to the quality of your final product. Along with making you an amazing homebrewer that makes you the envy of the species… well at the very least be able to drink tasty beers.

More readin

http://www.howtobrew.com/section3/chapter14-4.html

http://realbeer.com/spencer/FAQ/Fix-mash.html

Brewing With Fruit

Beer, Beer Styles, Brewing, Ingredients, Recipe

I use a lot of adjuncts in my brewing and there are a ton of ways one can go about adding fruit to their brew. I don’t like to mess with extracts and I don’t really like the way juices work in beer. However adding a little juice to your beer till you get the flavor you want is a good way to test how much you may need to add without spoiling a whole batch. You just want to be sure to use something that doesn’t have added sugars because it will completely through you off.

There are all sorts of considerations when talking about what to do with different fruits but if you’re just looking to get started I have a few recommendations for you.

  1. Use whole fruits. A lot of the flavors you want from the fruits are in the skin.
  2. Freeze your fruit first. Freezing burst a lot of the cell walls in the fruit allowing access to more sugars. Whether you’re putting it in the boil or in the fermentor it’s just going to benefit from this. A
  3. Prepackaged puree/concentrated is just fine. Just don’t get any with added sugars or preservatives.
  4. If you’re going to add it during fermentation do it in the secondary. The beer environment at this point is a low pH, less oxygen and has alcohol. Which is not a very good environment for other bacteria and yeasts to grow in.
  5. Don’t squeeze your bags. If you’ve put your juice mush into a muslin bag or similar, just lift and let it drain when you take it out. Squeezing will impart more bitterness than you want to get out of fruit.
  6. Compliment with hop profiles. I find there are a lot of similarities in hop profiles and fruits. Finding hops that compliment your fruits really help the flavor come across. But don’t overdo your hops!

More readin’

http://www.themadfermentationist.com/2010/05/best-way-to-add-fruit-flavor-to-beer.html

Brewing At 508

Bars, Beer, Beer Styles, Brewing, Business, Engineering, Equipment, History, Ingredients, NY Pro Am Brew PIT, Recipe

After a couple of weeks of kicking around some recipe ideas with Chris and finding the best time to brew we finally were able to collaborate on a new batch of beer. I got to brew into the wee hours of the night with Chris on his 2 bbl system to create Navidad Voyage. A recipe I based on a story that compliments some of the fare you’d find on their menu.

The story behind the beer is based on the third voyage of theSanta Maria, which we all know as the first ship in Columbus’ fleet to land in this great country now dubbed the U-S-of-A. Basically Columbus was not happy that he never really got to explore the West Indies like he had intended and wanted to take a crew down there to check it out. Well it just so happened by the time they got there it was Christmas Eve. And like a bunch of good Americans they decided to celebrate by breaking open the ale barrels.

As the crew started to celebrate more and more they were getting past the ability to steer the ship. So the duties passed off to the lower and lower crew mates until eventually the ship was being guided through the sea by the cabin boy. Not being very experienced at steering a ship he ended up running it into some rocks and damaging it beyond repair. The crew woke up to found they had crashed on Haiti and not being able to salvage the boat they decided to strip the timbers and turn it into a fort. He dubbed it La Navidad. And there it lives to this day. The boat that started it all crashed by a bunch of beer drinkers sitting on an island in the Caribbean.

Using this story we came up with a recipe for a standard English Bitter that they would most likely have on board. But decided to add some local flare with some Guava and All Spice. And being that we had so much fruit in the recipe we decide some salt would be a good addition to bring out the sweetness. Knowing that salt is a tricky substance to work with in beer this seemed like a prime opportunity to play around with it.

The beer is chugging along right now and we’re hoping to have it on tap end of the month. But if you’re not busy anyway why not stop by 508 for any of the other delicious brews on tap and come meet Charlie Papazian Oct 28 while you’re at it! If you can’t catch him at 508 head over to his book signing at Bitter & Esters Oct 29.

Chris has an amazing brewing system that he retrofitted in the restaurant basement. Not originally being thought of as a location to brew beer it’s amazing what one can do with a little creative energy. Just like any NYC homebrewer this system is something that’s unique and you wont find similar builds listed on r/homebrewing. I was super excited and lucky to brew on this set up even the cleaning didn’t seem like a chore! Thank you Chris for giving me the opportunity!

More readin

http://en.wikipedia.org/wiki/Santa_Mar%C3%ADa_(ship)

°Lintner

Beer, Brewing, Engineering, Equipment, Ingredients, Recipe

The more and more I brew the better and better I try to get at my efficiency. The first couple of batches I was plugging away into brewing calculators and getting amazing potential gravities from my recipes. The only problem was every calculator I was using was thinking I was getting 80% efficiency. As I failed to hit the ABV I wanted I read more and more on honing in on your brew setups efficiency.

One thing to check out is the °Lintner or Diastatic Power of your grain bill.  Lintner and Diastatic power both translate to the ability of your malts to convert starch into sweet-sweet sugar (maltose!). They need a minimum of 35 °Lintner to properly convert your starches.

This is where you need to make sure you check the Diastatic Power of your TOTAL grain bill. If you’re using some type of malt that has less than 35 °Lintner then it’s affecting the overall total of your Diastatic Power. If you’re getting poor efficiency on some brews vs others this could be a big reason why. This is why there are so many typical base malts. They contain the Diastatic Power you need to convert your starches to sugar.

It’s also another reason why barley is so heavily used in beers. It’s just got what it takes to get things going. I recently mashed some Malted Millet from CMC all by it’s lonesome. While I did get some conversion out of it the amount of sugar I got for 5 pounds of grain was only 1.017. HARDLY FERMENTABLE! I guess that’s why there is Sorghum syrup.

More readin

http://en.wikipedia.org/wiki/Degree_Lintner

http://beersmith.com/blog/2010/01/04/diastatic-power-and-mashing-your-beer/

Cayenne Pepper

Beer, Beer Styles, Brewing, Ingredients, Recipe

I recently created a beer that included cayenne pepper in the mix. I used about 1.5 ounces for my 5 gallon batch and I was pleasantly surprised with the outcome. It didn’t leave the traditional sting on my mouth most oils from other peppers do when I have them in beer.

It may be because I used the powdered version. I did supply some nice heat to the beer but was only present after you had a complete swig of the beer. It was a nice compliment to the sweet flavors coming across in the beer and definitely gave me more hope for future explorations with peppers in my recipes.

I added it at flame out which was plenty of time of it to build into the wort without overpowering everything. What surprised me most is how apparent it was when I tasted the wort, then almost completely gone right before the cold crash. By the final tasting though it was right about where I wanted it to be.

More readin’

http://www.homebrewtalk.com/f39/add-cayenne-pepper-chocolate-stout-129253/

https://byo.com/recipes-tag/item/859-hot-hot-hot-brewing-with-chili-peppers

Photo: Pink Sherbet Photography

A Day At Singlecut Beersmiths

Bars, Beer, Beer Styles, Brewing, Business, Engineering, Equipment, History, Ingredients, NY Pro Am Brew PIT, Recipe, Yeast

I’ve mentioned in a previous post  that I was a lucky son of a gun and was selected to compete in the NY Pro Am Brew PIT.  The first step in the process is to be paired with a brewery and then spend some time at their location to learn their process and how the formulate their recipes. From this experience the home brewer is sent off to his respective inspiration zone and create a recipe in the style of the brewery.

The brewery I’ve been paired with is Singlecut Beersmiths. To be honest I was a bad beer fan and had not visited this brewery before even though it’s in an adjacent borough. Same on me. But after spending the day there and learning about the brewery and tasting their delicious beers I realized I’ve done myself a disservice.

Singlecut specializes in unique lagers and hop forward ales that are inspired by rock musicians. The term “singlecut” comes from the style of guitar that has a single cut in the neck and makes it a more difficult instrument to play.  And that’s how they approach their brewing. No shortcuts!

This is a great mantra to pair with my home brew and personal style. I’m excited to collaborate on the recipe. Future post to come!

Check out some of the fun photos from the brewery below. Including an elevated stage for the rock shows they have at the brewery, 60 gallon fermentors on their laid on their side for a larger surface area and some photos of the brew that day Neil, an IPA blended in a Stout!

Rye Malt

Beer, Beer Styles, Brewing, Ingredients, Recipe

I’ve recently be using rye malt in one of my recipes and I have to say it really took the beer to the next level. When you first think of rye you might think of the taste you get out of rye bread. I haven’t seen that come across at all in the way I use it.

I’m using it at about 11% of my grain bill so I’m sure that’s part of the reason it’s not overpowering, but it seems to not only bring a little spiciness to the recipe but also completing the mouthfeel of my beer and making it much more smooth.

I did mash all my grains at a bit higher temperature however with some extra water as well. The big issue I did run into though was not completing a full beta glucan rest. I did not get my OG as high as would have liked. The next batch I’ll be doing will have a longer one and we’ll see how that affects the flavor.

If it looses the creamy feeling I’m getting now, I’ll opt for that opposed to higher alcohol. All in all it seems like an excellent grain for anyone to venture away from the traditional if you have the means.

More readin’

http://morebeer.com/brewingtechniques/library/backissues/issue1.3/hayden.html

Photo: WaterArchives.org

Tasting Beer – Palate Cleanser

Bars, Beer, Ingredients, Recipe

I’ve fallen victim to this myself a million times in my excitement to try a new beer, but if you truly want to know what a beer tastes like it’s important to cleanse your palate before jumping into a new brew. Just like with wine a lot of different factors go into the taste of the beer. Left over tannins, off flavors, heavy flavors, acids and all sorts of other items could be hanging out in your face whole and can leave you with an unfair opinion of a new beer.

The easiest palate cleanser is some chilled water, it does a fairly good job at cleaning out your mouth if you give it a little swish around. Plus it’s typically free at the bar and it’s always good to hydrate if you’re going to go a little overboard with your “tastings”. But all the other norms are available to help clean out your tongue bin. Cheese, crackers and bread are mild and really help get the job done.

What really works is different for everybody so just experiment with fruits and other mild flavors between a beer to see what sets you back to ground zero. Just stay away from the salty, spicy and greasy if you’re hoping to get your tastebuds back in line.

More readin’

http://healthyeating.sfgate.com/foods-cleanse-palate-2261.html

http://frenchfood.about.com/od/explorefrenchfood/a/palatecleanser.htm

http://en.wikipedia.org/wiki/Palate_cleanser

Photo: Samuel Hansen

Getting Bubbles In Your Brew

Beer, Brewing, Ingredients, Recipe, Yeast

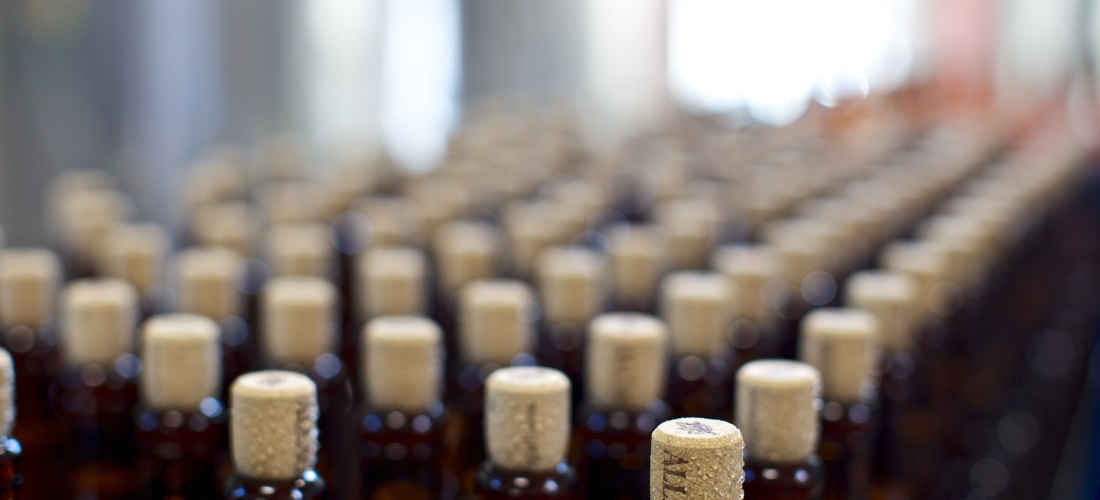
A flat beer can lead to all kinds of flavor issues and doesn’t have quite the same refreshing qualities you want out of your brew.  An over carbonated beer can lead to explosive results and also provide a flavor profile you’re not looking for. So lets take a minute to remind ourselves about proper priming.

First lets talk about our sugar source. I know most people will use corn syrup for their source. But I’m not a fan of processed foods so I’ve tried several other sticky items that I could can get my hands on, all with successful results. Below is a list of items I’ve tried. There are tons of other solutions that our yeast will eat but I can only speak to these.

  • Honey and brown sugar are great if you don’t mind the flavor addition.
  • Juices add a ton of flavor. When determining how much to use I treat it like honey when calculating how much to add. Be sure to buy something with zero preservatives or you’ll kill your yeast.  Citric acid (sodium citrate) is just fine however as it’s all natural.
  • Priming tabs are super easy when you’re bottling but I’ve never used them while kegging.
  • Corn sugar. Works like a charm and is cheap, but I’m not a fan personally.
  • Maple Syrup. Another great flavor profile but I’d say in my experience this flavor comes across more than honey or brown sugar when used for priming. Also I find I don’t need as much as the online calculators state. I typically use an ounce or two less.

Next lets talk about measurement. Finding the amount of sugar you need for your carbonation level is not an exact science… oh… wait… IT IS! Yesssss. There are a huge number of online calculators to do the math, so just make sure to know what style of beer you’re going for and how much CO2 you want and you’ll be fine. http://www.northernbrewer.com/priming-sugar-calculator/

Temperature. Our little yeast fellas are pretty tired by the time it comes to carbonation but if you had healthy yeast pitched in at the beginning of fermentation you should have plenty of yeast buddies ready for action. Kicking the temperature up a bit to say the 70°F-75°F will get your yeast back to feasting. Just be sure to do it gradually, you don’t want to kill them in the process from shock.

Leak in your lid. If you’re bottling or kegging you could have gas escaping somewhere. Check your caps and lids for any leaks.

Dead yeast. This is a big problem and most likely you wont have made it this far in your brewing to realize you’re not making the beer you set out to brew. Any number of reasons could lead to this and since you should have already identified this problem before getting to this step we’ll save that discussion for another post.

More readin’

http://www.midwestsupplies.com/over-carbonated-beer.html

http://www.jaysbrewing.com/2012/11/29/under-carbonated-beer-quick-fix/

http://beer.about.com/od/homebrewingextract/a/BrewingPrimer_2.htm

Photo: Lauren

New York Pro Am Brew PIT — Tickets on sale at noon!

Bars, Beer, Beer Styles, Brewing, Business, Engineering, History, Ingredients, NY Pro Am Brew PIT, Recipe

I was lucky enough to have won the opportunity to be part of the first annual New York Pro Am Brew PIT. WOOHOO!

What is the New York Pro Am Brew PIT you ask? Well I’ll tell you friendo. It’s an attempt to track the every expanding work of craft brewing, from home brewer to professional brewery.

Each of the five people who have been selected have been paired with a local brewery and will spend a day with that brewery to learn from them and collaborate on a recipe.

We’ll then go and brew a 5 gallon batch of beer which will later be served at the event on August 9th at Covenhoven located at 730 Classon Avenue in Brooklyn, NY.

There will be two tasting sessions at Session 1: 1-3pm, Session 2: 3:30-5:30pm. A vote will be held and one brewer will win the Audience Choice Award who will then brew their recipe with brewer Chris Cuzme at 508 Gastrobrewery.

On top of helping me succeed, Pretzels from Pelzer’s Pretzels will be provided, and a souvenir tasting glass commemorating the event is included.

Tickets are $25 and will be available beginning Thursday, June 26 at noon at this link http://nypro-ambrewpit.brownpapertickets.com!

Find attached the press release for more info and I hope you can come to show your support. BREW PIT Press Release 6.11.14

Breweries Involved

Hosted By

TICKETS! http://nypro-ambrewpit.brownpapertickets.com/

Photo: Quinn Dombrowski

Yeast Pool Party

Beer, Brewing, Ingredients, Yeast

If you don’t use liquid yeasts than you’re most likely using dry yeast (unless you’re all up in wild yeasts business and just seeing what life brings you). Dry yeast packets typically contain enough yeast to just pitch it in and go. But you’d be doing your tastebuds and the buds of those you’re subjecting your brew to a huge disservice by not rehydrating the yeast first.

Let me esplain.

Just dumping your non hydrated yeast into your wort is kinda like tossing someone into the pool when they’re not expecting it. Sure it’s fun! For you! But the person who was tossed in isn’t having that much fun. They check for the cell phone, maybe quickly pee in surprise and jump out before they really had a chance to appreciate a little trot round the pool. Then they get all upset and YELL at you and make a scene. Everyone stops what they were doing. Nobodies laughing and YOU look like a JERK!

Don’t be a jerk man. Just take the time to rehydrate that yeast. You know what you get when you rehydrate that yeast? A freaking pool party that makes the yeast invite all its friends too. Rehydrating yeast leads to less yeast that die when pitched from the cold crash, which also produces off flavors because the dying yeast produce different esters than what you were going for. It also leads to stronger yeast who can and want to play pool party games that creates more yeasts and delicious flavors.

Just be sure to use warm water. Cause the yeast don’t like their water too cold. Like 105°F warm. Then make sure to cool it down to your wort temp before pitching so as not to surprise them again.

More readin’

http://www.howtobrew.com/section1/chapter6-5.html

http://www.homebrewersassociation.org/lets-brew/rehydrating-dry-yeast/ 

Photo:  Craig Howell

Pay very close… Attenuation

Beer, Beer Styles, Brewing, Ingredients, Recipe, Yeast

Attenuation simply put is the measured amount of how much a yeast converts malt sugars to CO2 and ethanol. All your yeasts will include an average attenuation because there are several factors that could change the attenuation of the yeast being used. The largest factor is the amount of sugars you stat with when you pitch it in your wort.

We all measure this (if we haven’t had too much to drink by the time it comes to measuring) by checking the OG of or wort and are FG once the yeast has all but finished it’s cycle weeks later.

A low attenuation is typically between 65%-70%, a medium is 71-75% and a high one being 76%-80%. Here’s the math for how to actually do that (From FG = OG – (OG x %) => % att. = (OG-FG)/OG) but if you’re like me, you leave the math to the pros and just get busy making delicious liquids.

More readin’

http://www.howtobrew.com/section1/chapter6-1.html

http://www.whitelabs.com/beer/homebrew/beginners-attenuation-and-flocculation-definitions

http://www.homebrewtalk.com/wiki/index.php/Understanding_Attenuation

Attenuation Chart http://byo.com/resources/yeast

Low attenuation yeast http://www.whitelabs.com/yeast/wlp002-english-ale-yeast

Medium attenuation yeast http://www.danstaryeast.com/products/bry-97-american-west-coast-beer-yeast

High attenuation yeast http://www.northernbrewer.com/shop/saflager-w-34-70.html

Photo: Daniel Spiess

Brettanomyces

Beer, Beer Styles, Brewing, Ingredients, Recipe, Yeast

There are plenty of different yeast strands one can use to brew with, and they’re all a sub genera of Saccharomycetaceae. Brettanomyces is a strand of yeast that in most styles of beer would turn it into a flavor that’s considered off putting. But for our Belgium style beers we relish in the unique flavors Brett brings to our bubbles.

Brettanomyces does’t do the heavy lifting when it comes to making our booze boozy that’s still typically the job of a Saccharomyces.  Brett works sometimes in tandem or later in the process with Saccharomyces to produce the flavors you’d expect to find in a sour or lambic beer.

Brett is taking up more adoption by craft breweries these days and is kind of a game changer as far as flavor goes. Imagine finding a nice spicy Brett that could compliment the hopped hoppiness of a strong IPA. Or maybe a fruity blonde that compliments itself with some fruity Brett. There’s a lot of opportunity out there for these wild fellas.

More readin’

https://www.wyeastlab.com/com-lambic-brewing.cfm

http://www.nytimes.com/2013/01/02/dining/brettanomyces-a-funky-yeast-makes-flavorful-beers.html?_r=0

http://en.wikipedia.org/wiki/Brettanomyces

Beers to try:

Allagash Golden Brett

Evil Twin Femme Fatale Brett

Seizoen-Bretta

Boulevard Brewing Saison-Brett

Anchorage – Love Buzz Saison

Transmitter Brewing

Photo: Allagash Brewing

Hops In The Boil

Beer, Brewing, Ingredients, Recipe

When building a recipe it’s always tough for me to select which delicious hops I’m going to use in my brew. The part that makes it so difficult for me is making sure I understand how the hops are going to effect the flavor and aroma based on when I toss them in the boil.

Most brew sites do a fine job of explaining how the hops will effect your beverage but experience trumps knowledge every time. In general though, adding your hops in the beginning of the boil will release most of its bitterness. While adding them to the end of the boil you’ll get a wonderful aroma and less flavor.

But what happens in the middle? The grey area of each hop. I’ve messed around with plenty of hops during the middle of the boil and I find that they can be pretty unpredictable at times. I’m not sure if it’s the fact I do small batches and it’s easier to create unique flavors if you’re a couple minutes off of dumping in the hops. But it is a lot of fun to see how recipes evolve and finding ways to perfect my hop amounts and additions with each brew.

More readin’

http://beersmith.com/blog/2008/11/11/best-hop-techniques-for-homebrewing/

http://www.howtobrew.com/section1/chapter5-1.html 

http://www.mrmalty.com/late_hopping.php

Photo:  Paul Miller


Gruit. Herb Crusted Beer.

Beer, Beer Styles, Brewing, Engineering, History, Ingredients, Recipe

OK. It’s not technically herb crusted but I kinda want a nice herb crusted pork loin with a nice Gruit to wash it down after thinking about this post. Gruits are probably the biggest recipes I like to tinker around with.

Gruits are a mixture of spices you add to your beers that traditionally replace hops. The herbs serve not only as a flavoring and aroma agent like a hop but also as a preservative for the beer at times. There are all types of herbs and spices one could use to make a Gruit but here’s a list of some of the more common ones.

  • sweet gale
  • mugwort
  • yarrow
  • ground ivy
  • horehound
  • heather
  • black henbane
  • juniper berries
  • ginger
  • caraway seed
  • aniseed
  • nutmeg
  • cinnamon

Gruits to Try

More Readin’

http://en.wikipedia.org/wiki/Gruit

Photo: Casey Fleser